
Installing memory
Use this procedure to install additional memory. Before you begin, print the configuration (touch Menu, touch Information,
touch Print Configuration, touch OK) to find out how much memory is installed in the product before adding more memory.
The table lists the maximum amount of memory allowed for each DIMM slot.
Slot label on the
Configuration page
Slot label on the
Formatter board
Description
Slot 1
J1
Flash firmware
Slot 2
J2
128 MB
Slot 3
J3
128 MB
Slot 4
J4
128 MB
Total
384 MB
C Product memory and expansion
221
Installing memory
CAUTION
Static electricity can damage DIMMs. When handling DIMMs, either wear an
antistatic wrist strap or frequently touch the surface of the DIMM antistatic package,
then touch bare metal on the product.
To install DIMMs
1
If you have not already done so, print the configuration to find out how much
memory is installed in the product before adding more memory.
2
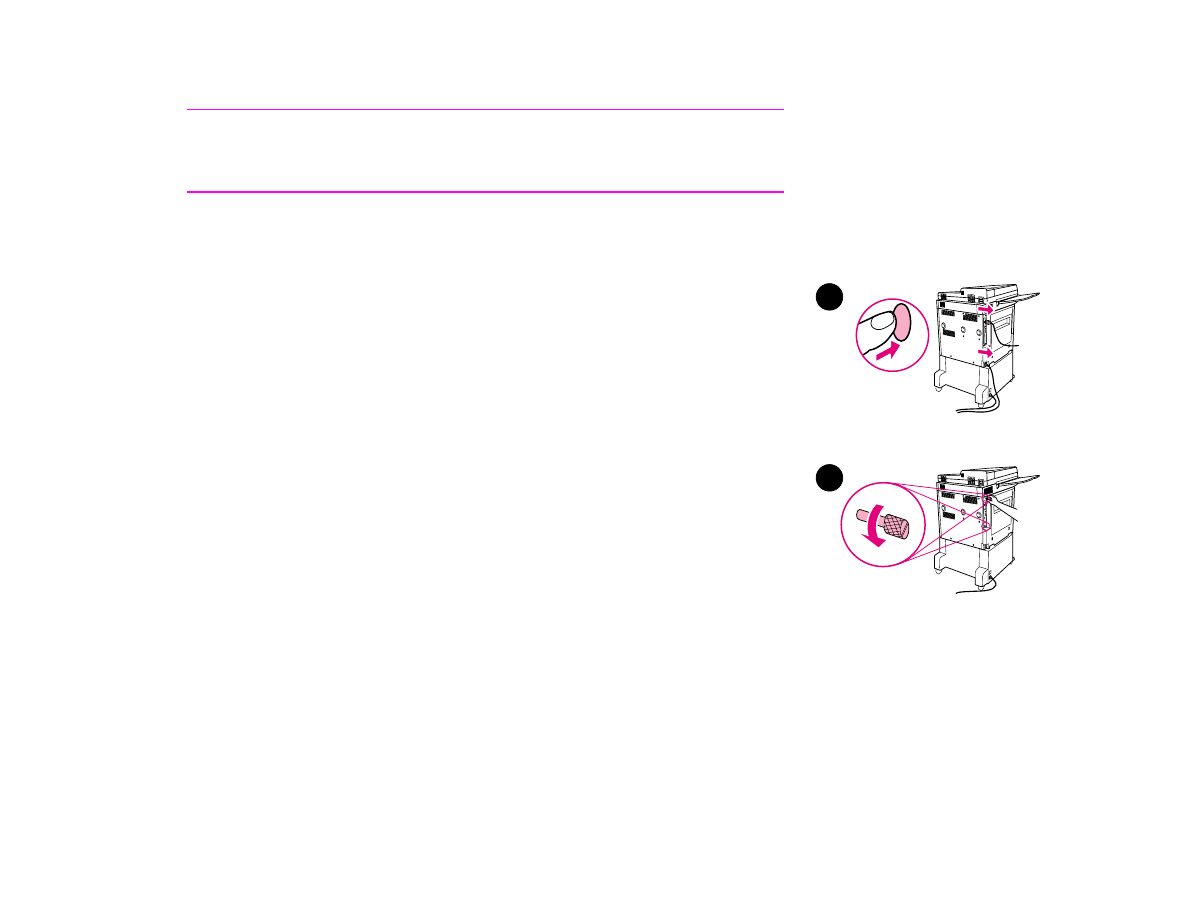
Turn the product off. Disconnect the power cord and any cables.
3
Loosen the two captive thumb screws on the back of the product.
3
2
C Product memory and expansion
222
Installing memory
4
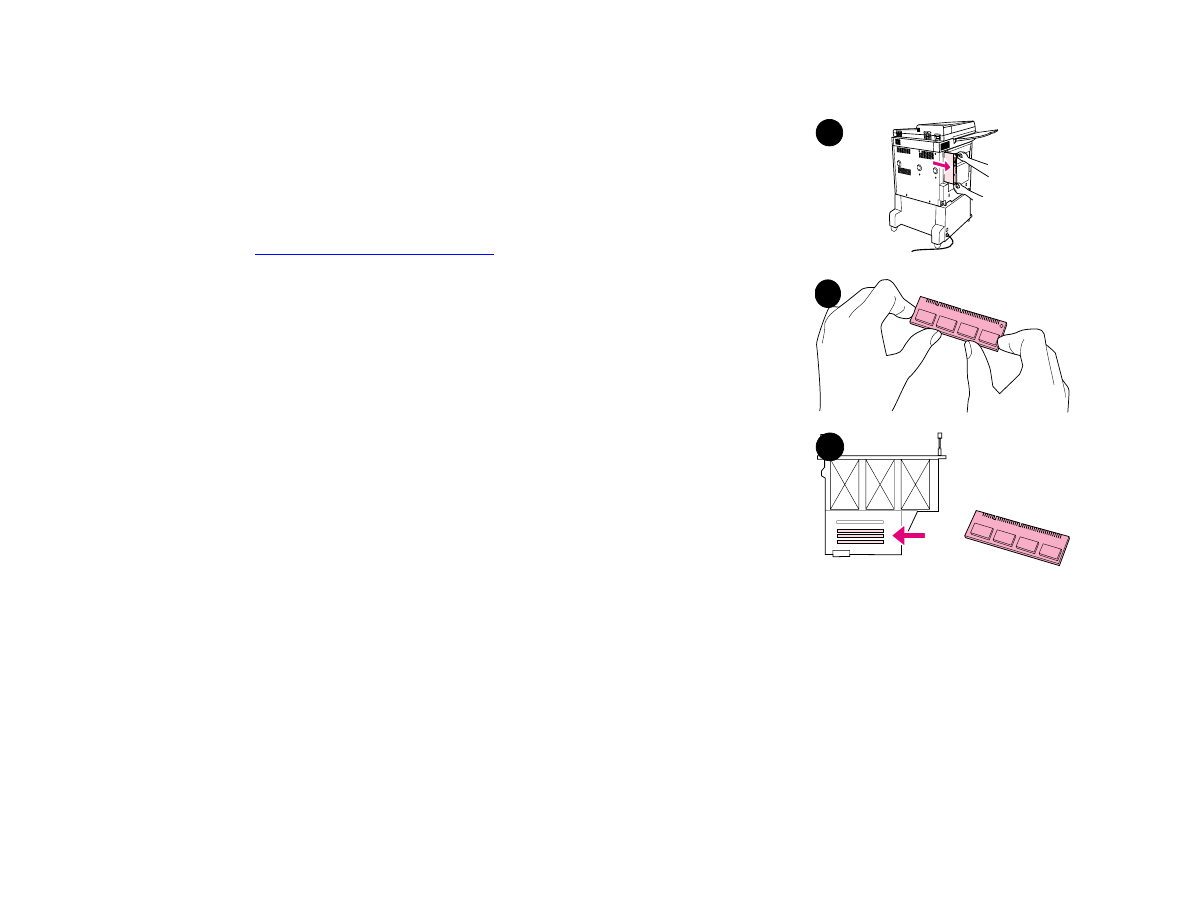
Grasp the screws and pull the formatter board out of the product. Place it on a
flat, non-conductive surface.
5
Remove the DIMM from the antistatic package. Hold the DIMM with fingers
against the side edges and thumbs against the back edge. Align the notches on
the DIMM with the DIMM slot. (Check that the locks on each side of the DIMM
slot are open, or outward.)
See
“Installing memory” on page 220
for the maximum amount of memory for
each DIMM slot.
6
Press the DIMM straight into the slot (press firmly). Make sure the locks on
each side of the DIMM snap inward into place. (To remove a DIMM, the locks
must be released.)
6
4
5

C Product memory and expansion
223
Installing memory
7
Slide the formatter board back into the product and tighten the two screws.
8
Plug in the power cord and connect all cables. Turn the product on.
8
7

C Product memory and expansion
224
Checking memory installation