
Printing envelopes
You can print envelopes using Tray 1, which holds up to 10 envelopes. Many types of envelopes can be printed from Tray 1.
Printing performance depends on the construction of the envelope. Always test a few sample envelopes before purchasing a
large quantity. For envelope specifications, see the introduce guide on the product CD, or go to
www.hp.com/support/lj9000
.
CAUTION
Envelopes with clasps, snaps, windows, coated linings, exposed self-stick adhesives, or other synthetic materials can
severely damage the product. Do not use envelopes with pressure-sensitive adhesive.
The basic steps for printing envelopes are:
1
Load the envelopes. See
“To load envelopes in Tray 1” on page 57
.
2
Move the fuser levers. See
“To change the fuser levers” on page 58
.
3
Send the print job. See
“To print envelopes from a program” on page 59
.
5 Printing
57
Printing envelopes
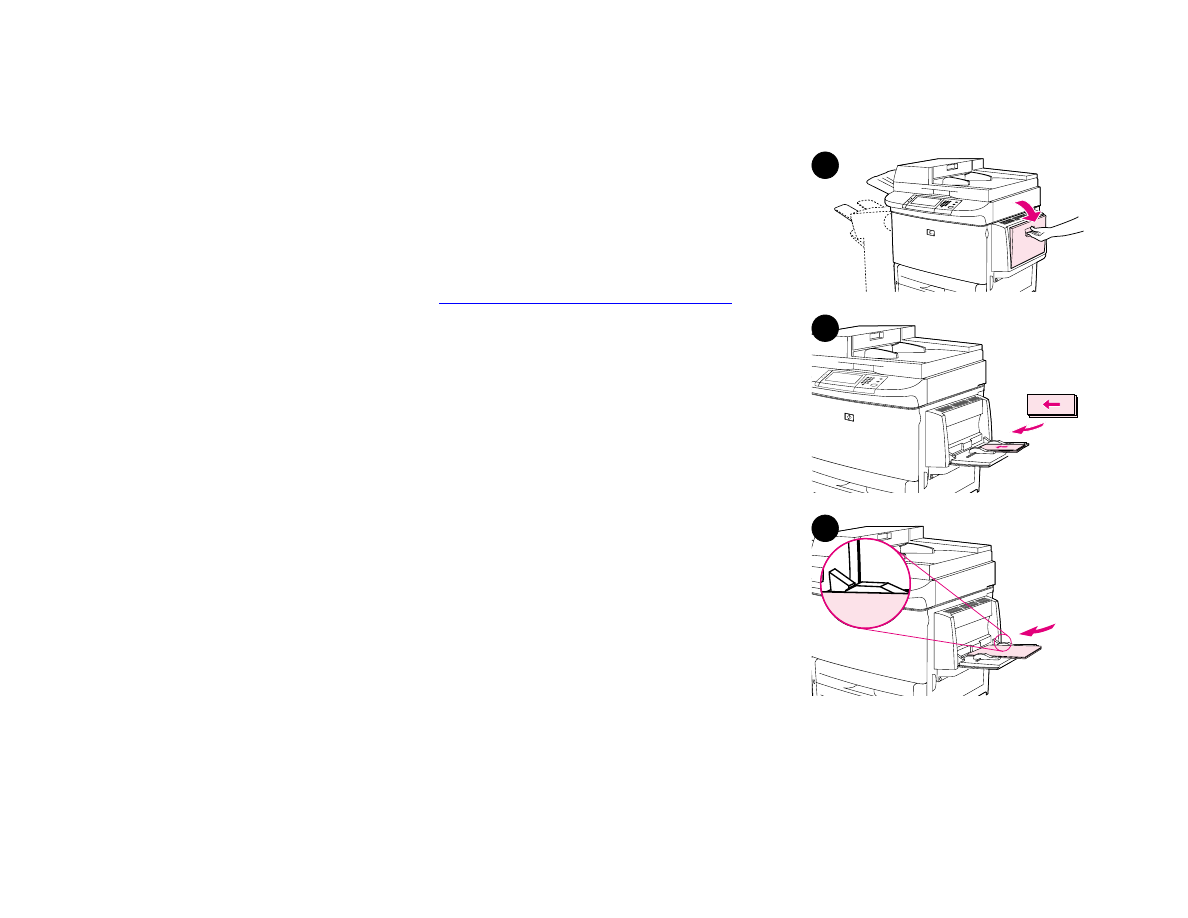
To load envelopes in Tray 1
1
Open Tray 1, but do not pull out the extension. (Most envelopes feed best
without the extension. However, oversize envelopes might need the extension.)
2
Load up to 10 envelopes in the center of Tray 1 with the side-to-be-printed
facing up, and the postage end toward the product. Slide the envelopes into the
product as far as they will go without forcing them.
3
Adjust the guides to touch the envelope stack without bending the envelopes.
Make sure the envelopes fit under the tabs on the guides.
4
Change the fuser levers (see
“To change the fuser levers” on page 58
).
1
2
3
5 Printing
58
Printing envelopes
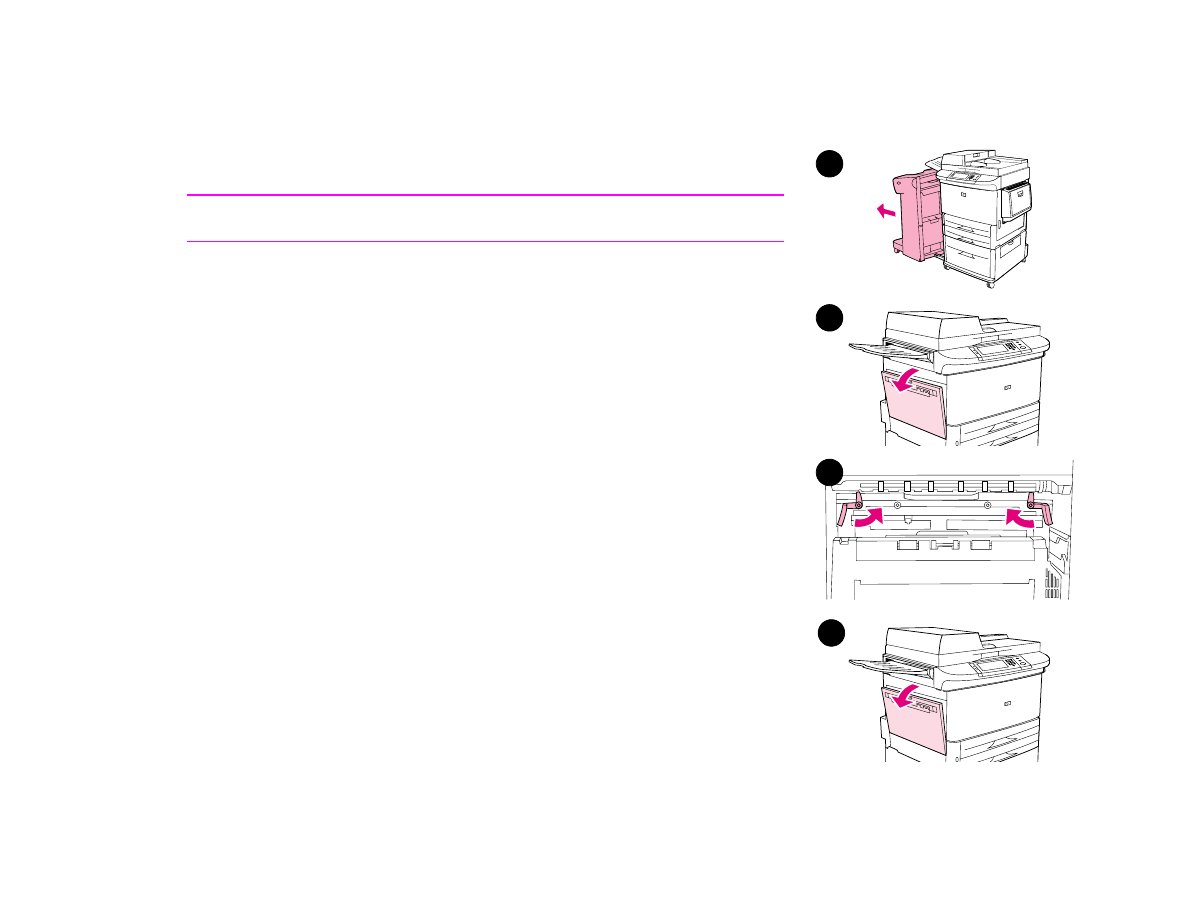
To change the fuser levers
1
Move the output device from the product to gain access to the left door.
2
Open the left door.
WARNING!
Avoid touching the adjacent fusing area as shown in step 2. It can be HOT.
3
Locate and lift up the two blue “T” shaped levers.
4
Return the fuser levers to the down position after printing an envelope.
5
Close the left door.
1
4
2
5

5 Printing
59
Printing envelopes
To print envelopes from a program
1
Load envelopes into Tray 1.
2
In your program or in the driver, specify Tray 1 or Automatic. Or, select the paper source.
3
Set the appropriate envelope size and type. For envelope specifications, see the introduce guide on the product CD, or go
to
www.hp.com/support/lj9000
.
4
If your program does not automatically format an envelope, specify “Por trait” for page orientation.
CAUTION
To avoid a jam, do not remove or inser t an envelope after you begin printing.
5
Set margins to within 15 mm (0.6 inch) from the edge of the envelope. For best print quality, set margins for a return and
mailing address (typical address margins for a Commercial #10 or DL envelope are offered). Avoid printing over the area
where the three back flaps meet on the back of an envelope.
6
To print by type and size of paper, see the introduce guide on the product CD, or go to
www.hp.com/suppor t/lj9000
.
7
Select the Bin 1 as the output location, if you print envelopes to the stacker or stapler/stacker. If you print envelopes to
the multifunction finisher, select the Stacker bin as the output location.
8
When finished, return the fuser levers to the down position.
CAUTION
Failure to return levers to the down position for standard paper types can result in poor print quality.

5 Printing
60
Printing special paper